
Installation
Install Better B2B, assign a Location Admin, add the Team page to customer accounts, and enable the locations that can manage teams.
On this page
Install and open the app
- Open the installation link from 1Sync, or the App Store listing when it’s available, then select your store. Get in touch if you need a link.
- Review the requested access, then click Install.
- If Shopify shows a plan page, select a plan and review its terms before approving.
- In Shopify admin, open Apps → 1Sync - Better B2B.
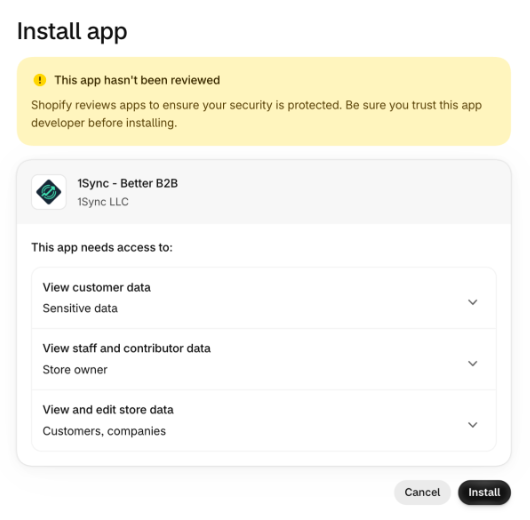
Installing from a link can show Shopify’s review notice, as it does here.
Prepare a company and Location Admin
- Open Customers → Companies. Open an existing company, or click Add company and create one with a location.
- Add the customer who will manage the location. Use the email address they’ll use to sign in to customer accounts.
- On the company page, open that customer’s actions and select Manage permissions.
- Select the location, choose Location admin, then click Save.
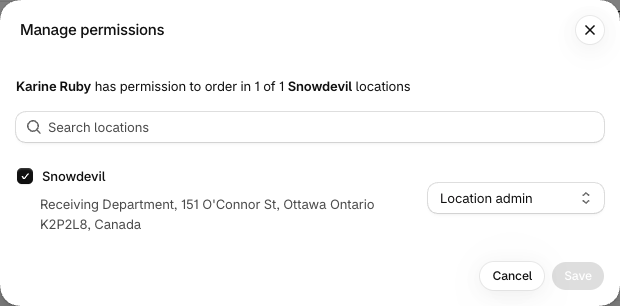
These screenshots use the sample company Snowdevil and sample contact Karine Ruby. To test sign-in, use an inbox you can access.
You assign Location Admins. Better B2B adds colleagues with Ordering only access, and it doesn’t promote them to Location Admin.
Add the Team page to customer accounts
-
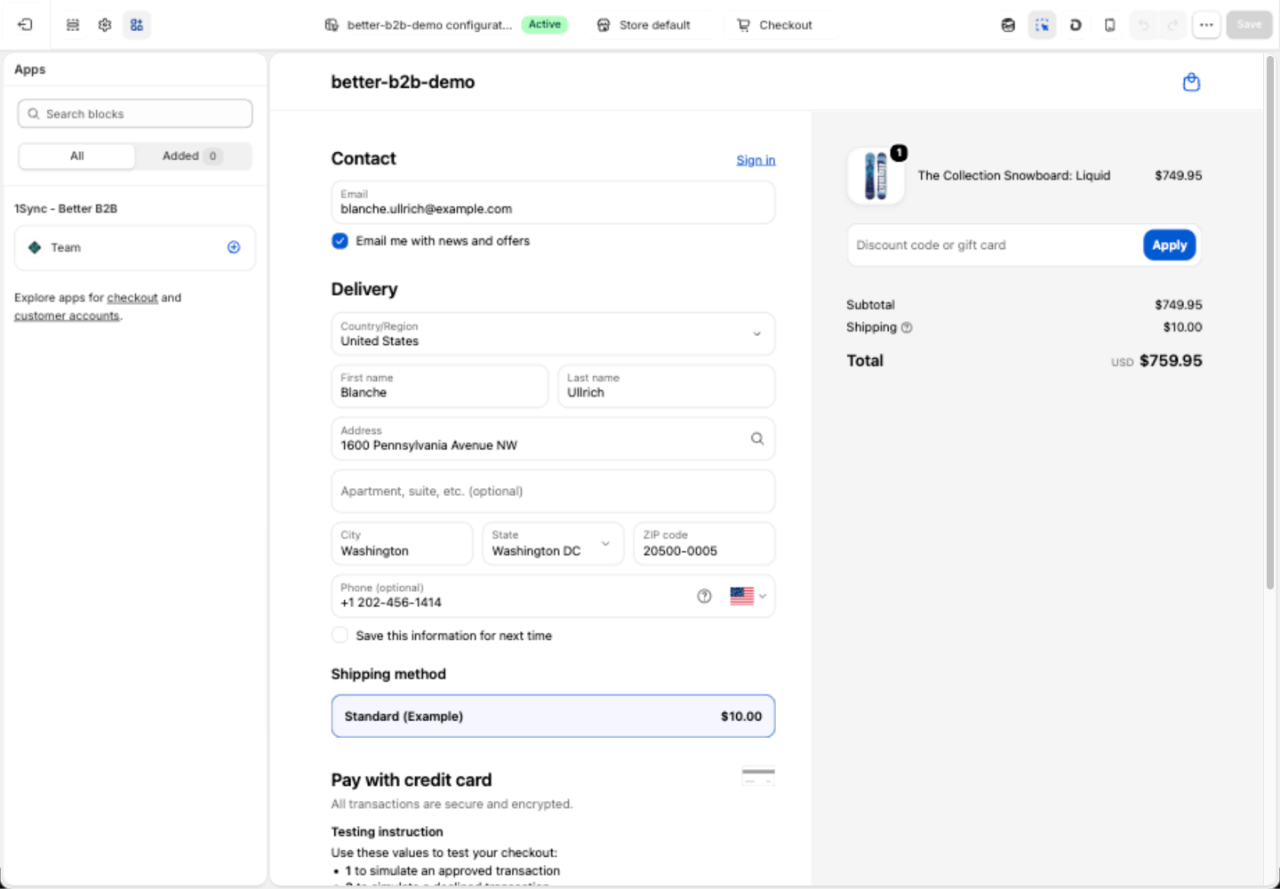
Go to Settings → Checkout and click Edit or Customize on your active configuration.
-
Open Apps in the checkout and accounts editor.
-
Under 1Sync - Better B2B, click + beside Team, then choose Accounts.
-
Save your changes in the editor.
-
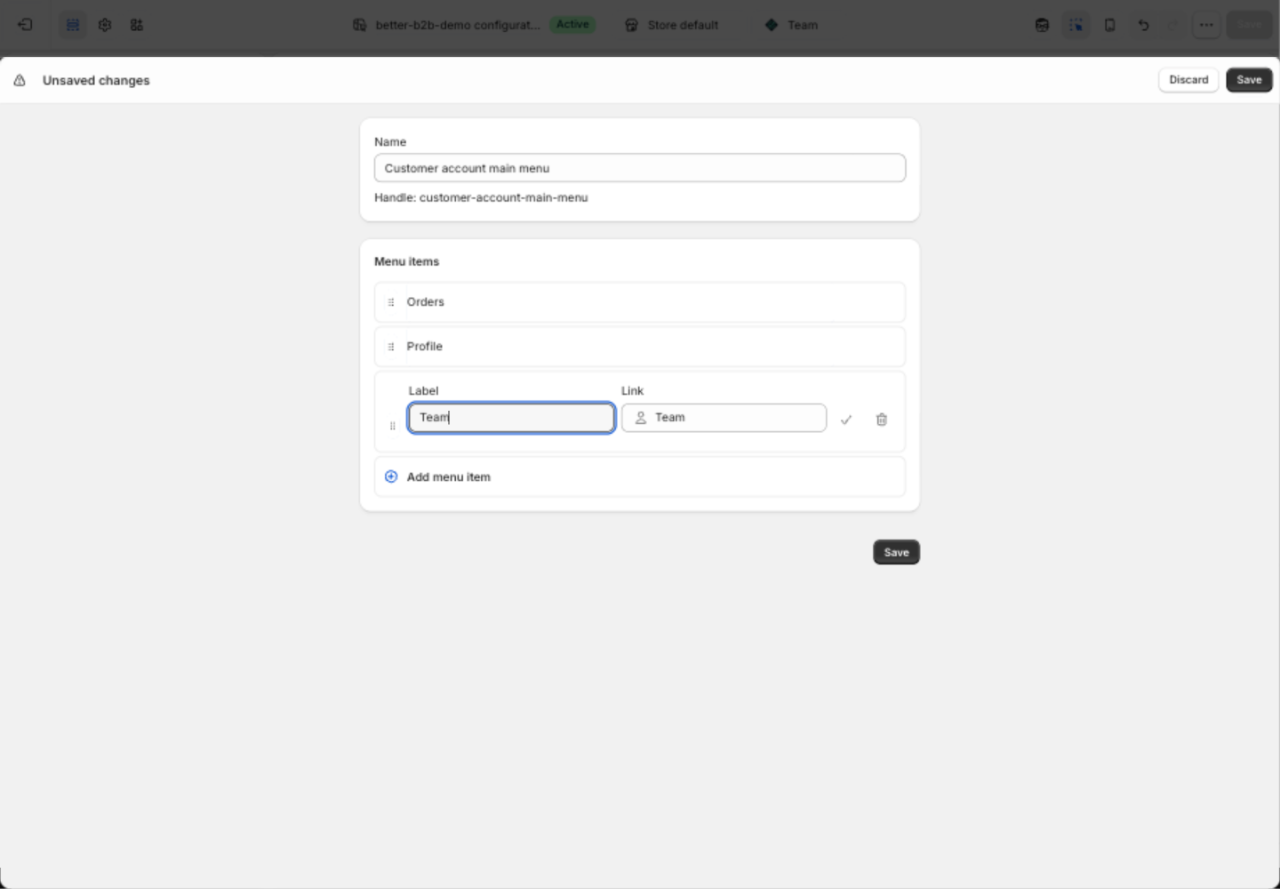
Click Add to menu. Keep Team as the label and the app’s Team page as the link, then save the menu. If Shopify offers Create menu, create or select your customer account menu first.
-
Confirm that Team appears in your account navigation.
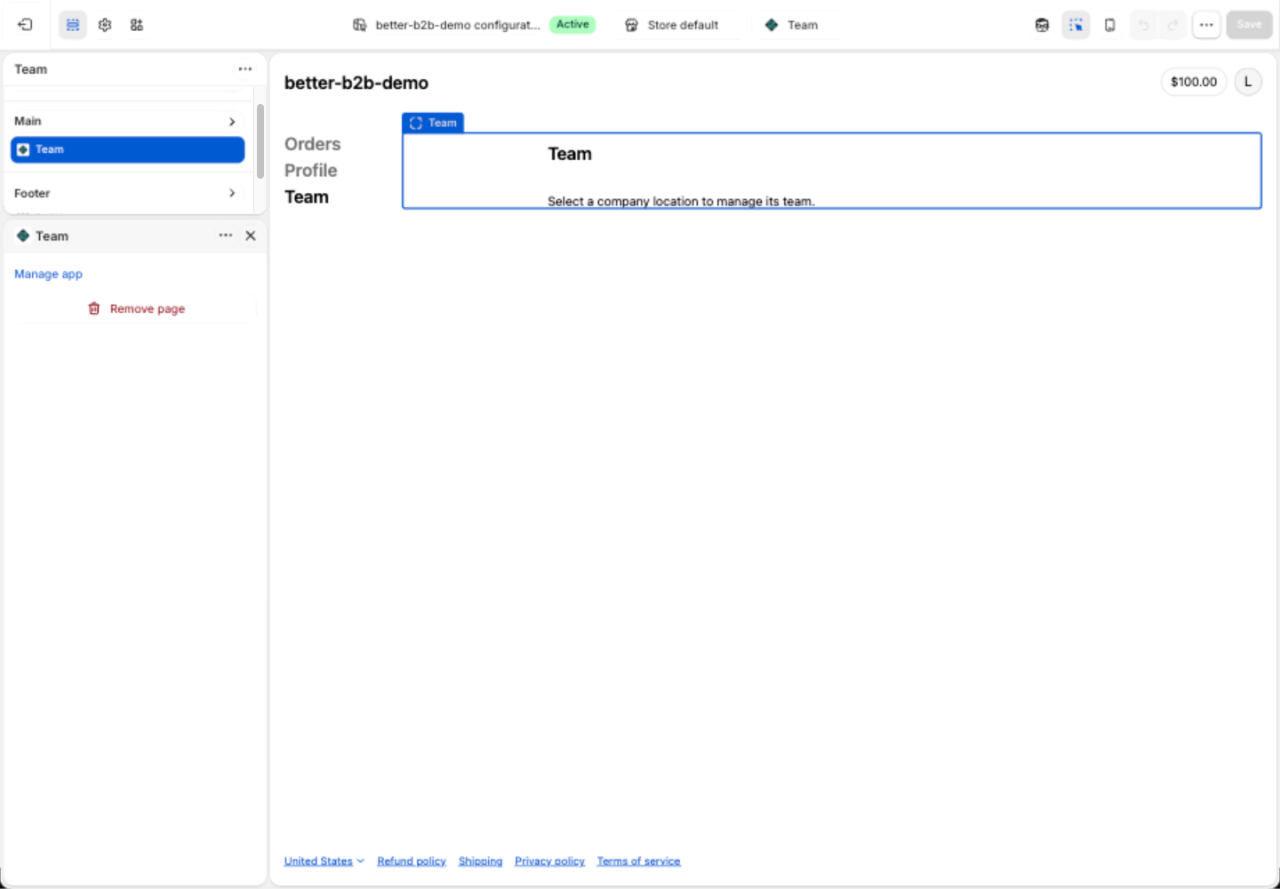
“Select a company location to manage its team” is expected in the editor preview, where no company location is selected. Test the actual page while signed in as a company contact.
Add and pin the Team access blocks
- Open a company under Customers → Companies.
- In Blocks, click Block and select Team access.
- Click the pin icon, labeled Pin to page for all staff. The block’s Preview label disappears once it’s pinned.
- Open a company location and repeat these steps. Company pages and location pages have separate block placements.
Enable locations
Choose the option that fits:
| To enable | Do this |
|---|---|
| One location | On its company location page, turn on Allow team management in the Team access block. |
| A company | On its company page, turn on its location switches or click Enable all. |
| Several companies | Open Better B2B, select companies in the table, click Review selection, review the locations, then click Enable [count] locations. |
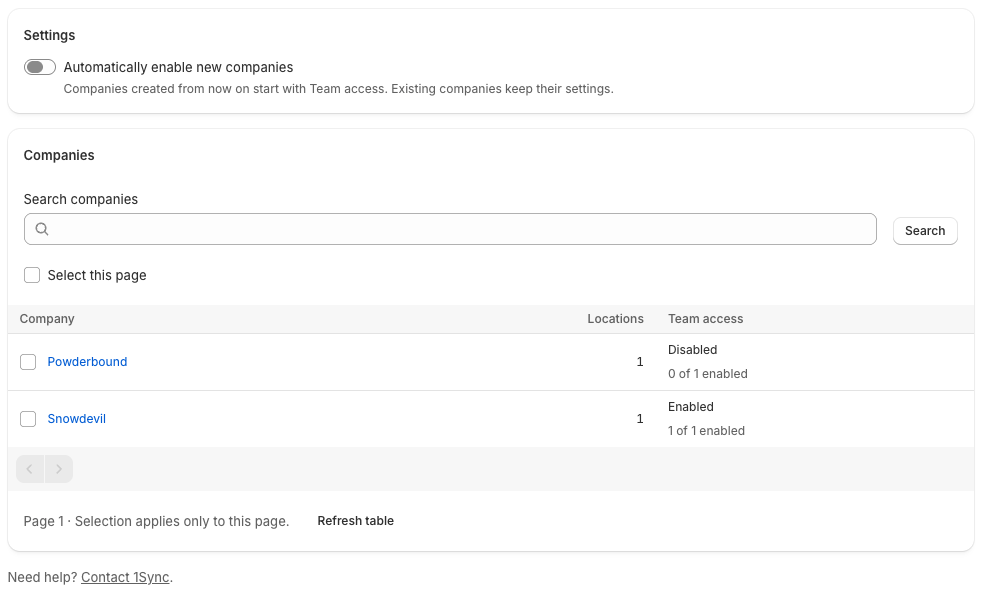
Confirm the location shows as enabled before you continue. Bulk enablement only applies to the locations shown in the review, and it doesn’t send any emails.
Enable new companies automatically
Automatically enable new companies is optional and starts off. It applies to companies created after you turn it on. Existing companies keep their settings.
Turning it off later doesn’t revoke access that companies already inherited. To disable a location, use its switch.